
 Stemdeck
Build a beat-matched mix with stem transitions
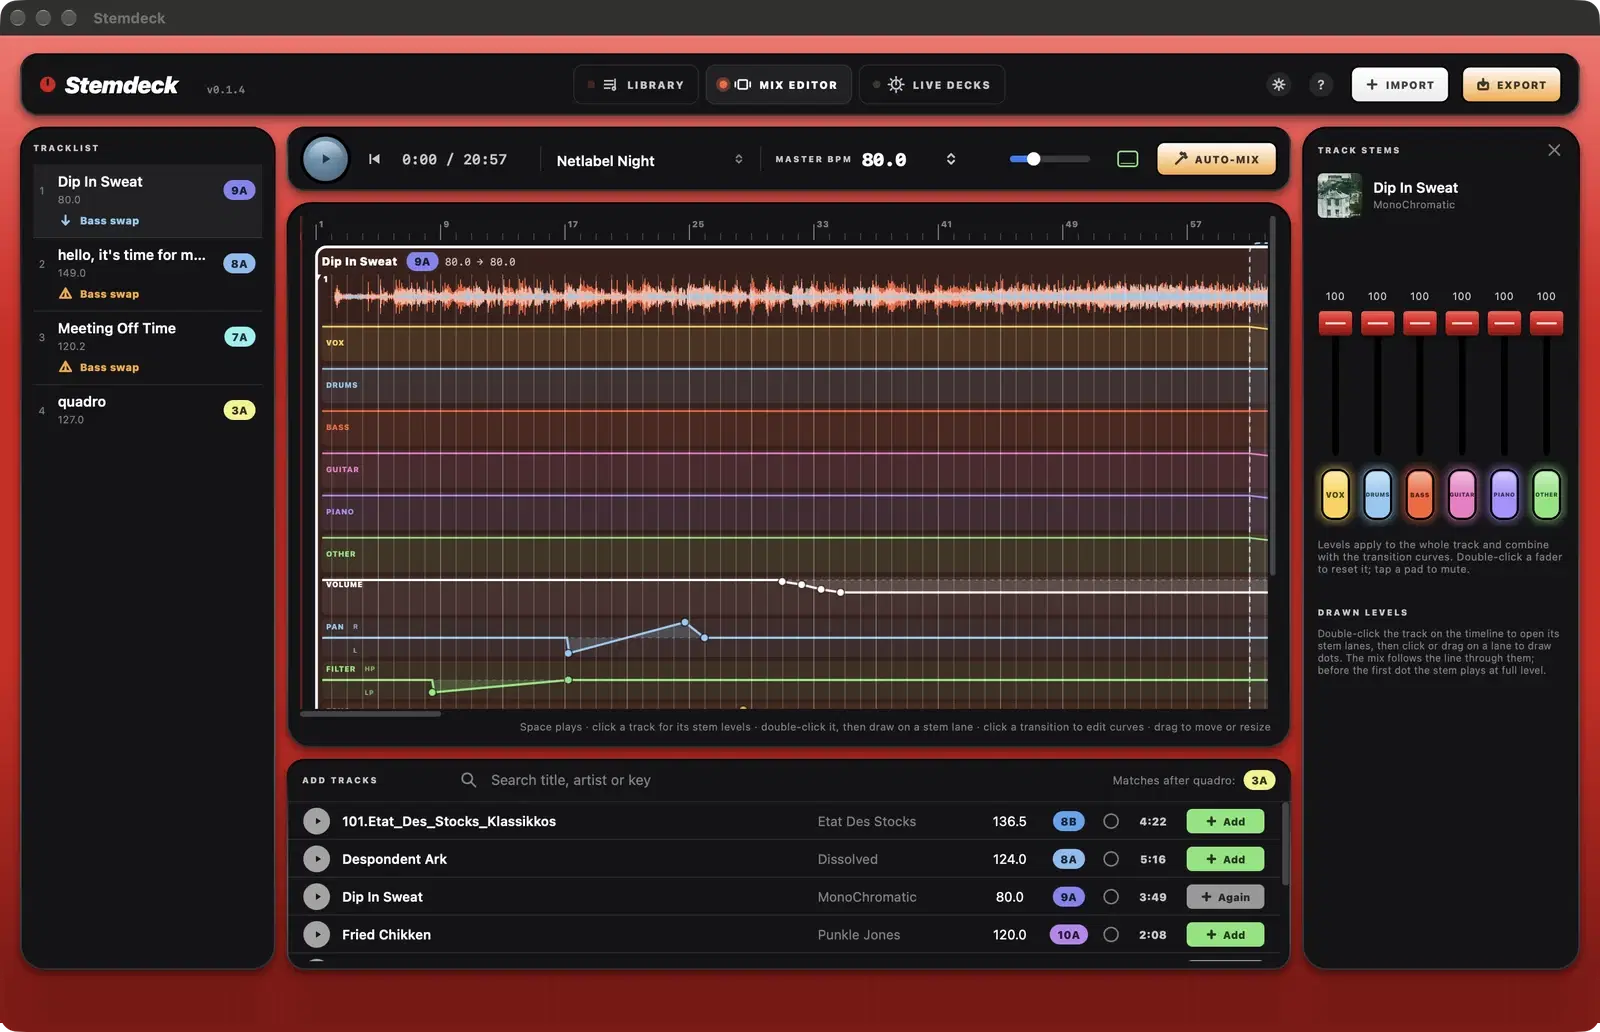
The Mix editor lays your tracks out on a bar timeline. Every track plays at the mix's master tempo and comes in on a downbeat, and each change between tracks is a transition with its own stem curves.
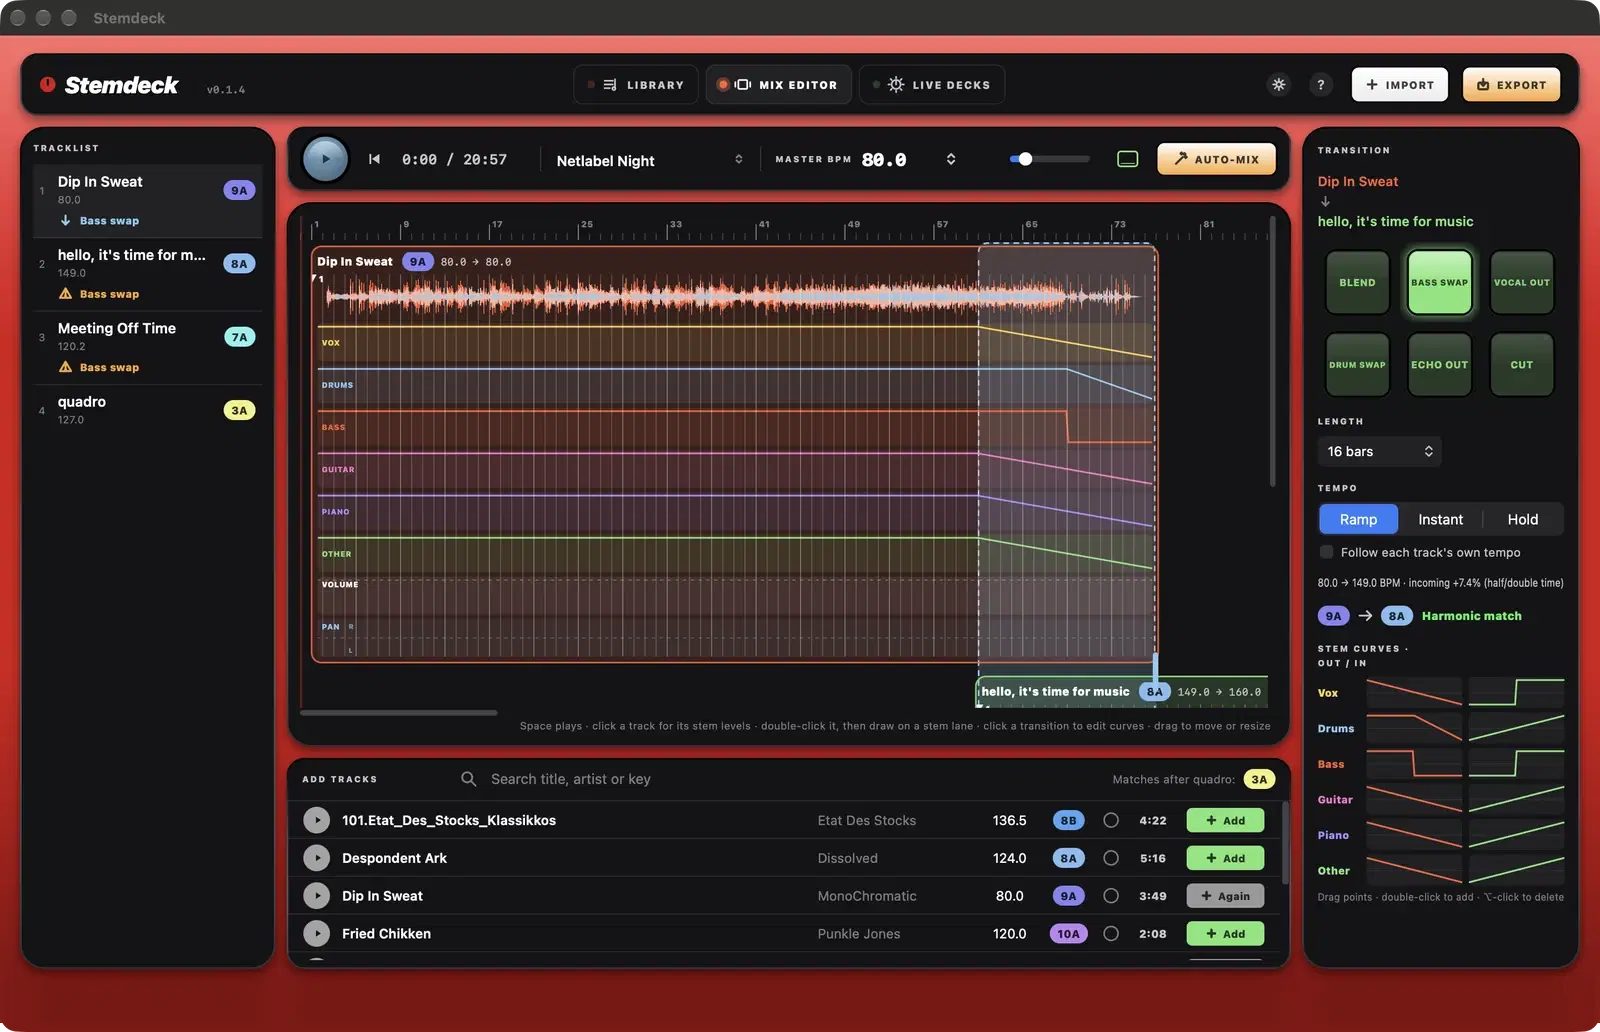
Add tracks
- Use the Add tracks browser under the timeline: search, preview and click Add, or drag a track onto the timeline. A tick shows tracks whose key mixes well with the last track in the mix.
- Reorder tracks by dragging them in the tracklist on the left, and right-click one to remove it.
- Auto-mix orders the tracks by key, tempo and energy and sets the master BPM from the first track.
- Adding a track that isn't split yet starts splitting it, so its stem lanes are ready by the time you edit the mix.
The timeline
- The dashed region between two tracks is their transition. Its label shows the preset and length.
- Drag a track sideways to change where it comes in, in whole bars. Drag a transition's right edge to change its length.
- Double-click a track to show its stem lanes (four or six) and the level of each stem across the track.
- Use the zoom slider in the toolbar, and the panel button next to it to hide or show the track browser.
Beat markers
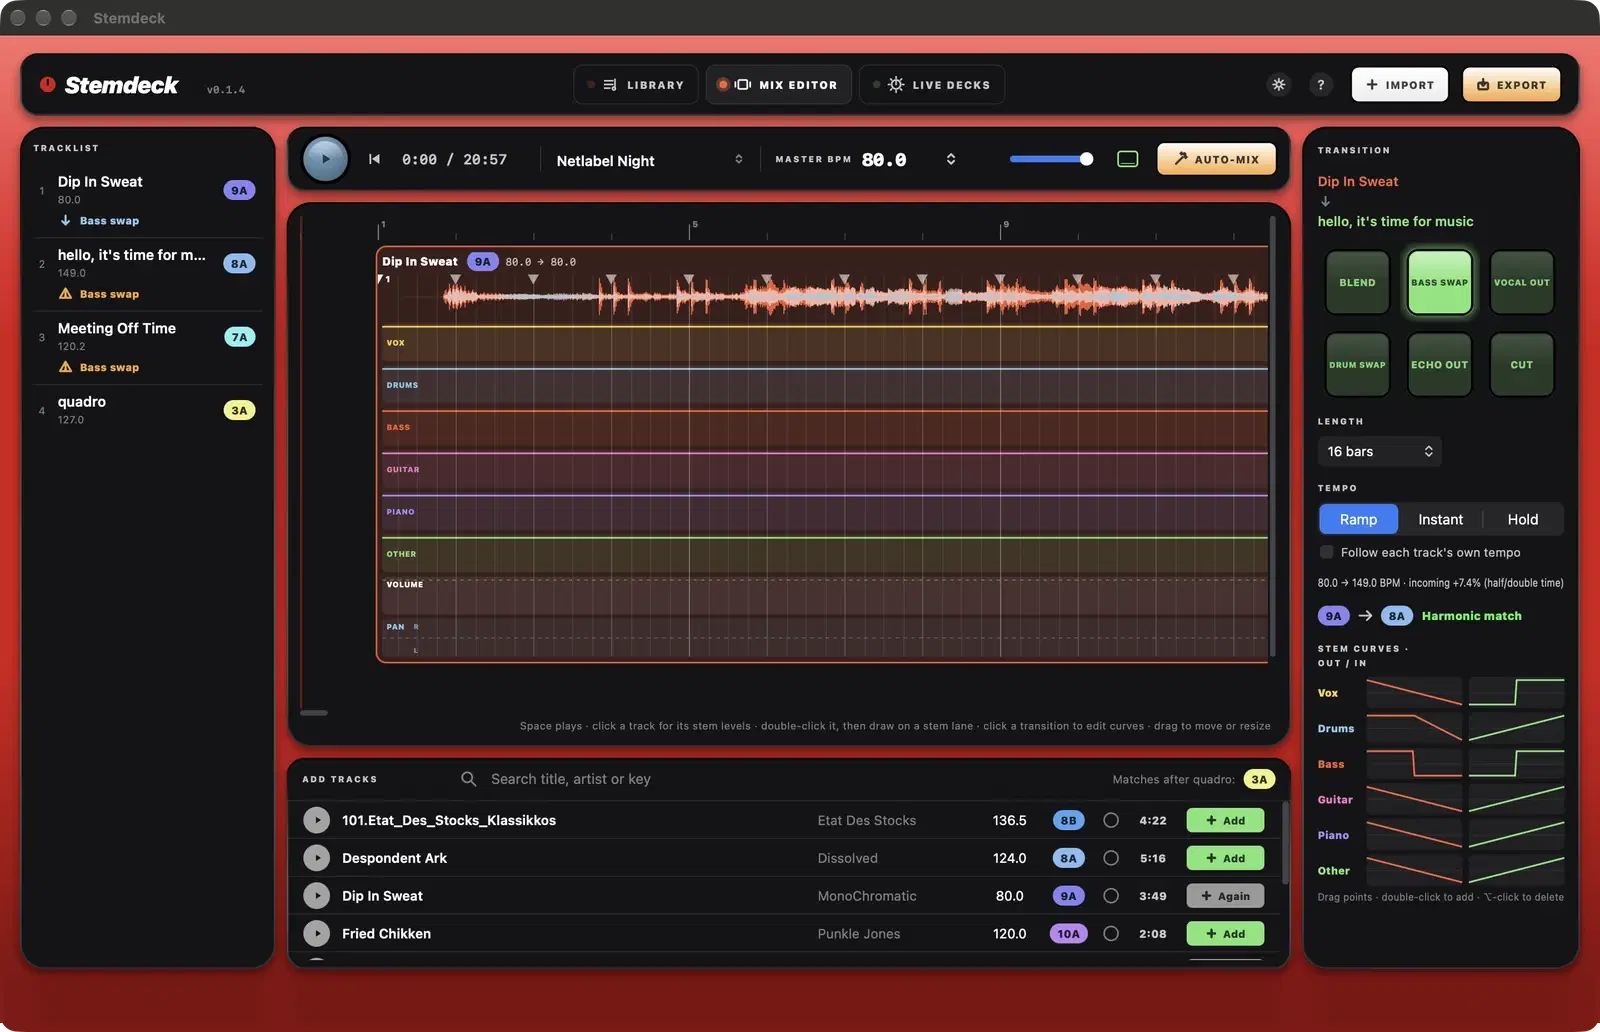
In the version for Windows, Linux and the downloadable Mac version, each track on the timeline shows its beat grid: a thin line on every beat, a brighter one on every bar and the brightest every four bars. Zoomed out, only bars (or every fourth bar) are drawn. A small flag marks each bar, with 1 on the track's first downbeat.
- If the lines don't sit on the kicks, drag a flag sideways to move the whole grid. It snaps to the nearest beat in the audio; hold Cmd (Ctrl on Windows and Linux) to place it freely.
- Double-click a flag to put the grid back where Stemdeck detected it.
- Right-click a track for Edit beat grid, which opens the track's info sheet to change its tempo, and Reset beat grid.
- The grid belongs to the track, so moving it changes it everywhere: the library, the live decks and every mix the track is in. The mix lines up again on the new beats.
Transitions
Click a transition to edit it in the inspector on the right.
- Presets: Blend, Bass swap, Vocal out, Drum swap, Echo out and Cut. Each sets a curve for every stem of both tracks.
- Length: 1 to 32 bars.
- Tempo: by default the whole mix plays at the master BPM. Turn on Follow each track's own tempo to glide between each track's BPM during transitions, with Ramp, Instant or Hold.
- The inspector also shows the tempo change for the incoming track and whether the two keys are a harmonic match.
Edit stem curves
- Each stem has an out curve (the track leaving) and an in curve (the track arriving).
- Drag a point to move it, double-click to add a point and Option-click a point to delete it.
- Edited transitions are marked Custom. Click Reset to go back to the preset's curves.
Track stem levels
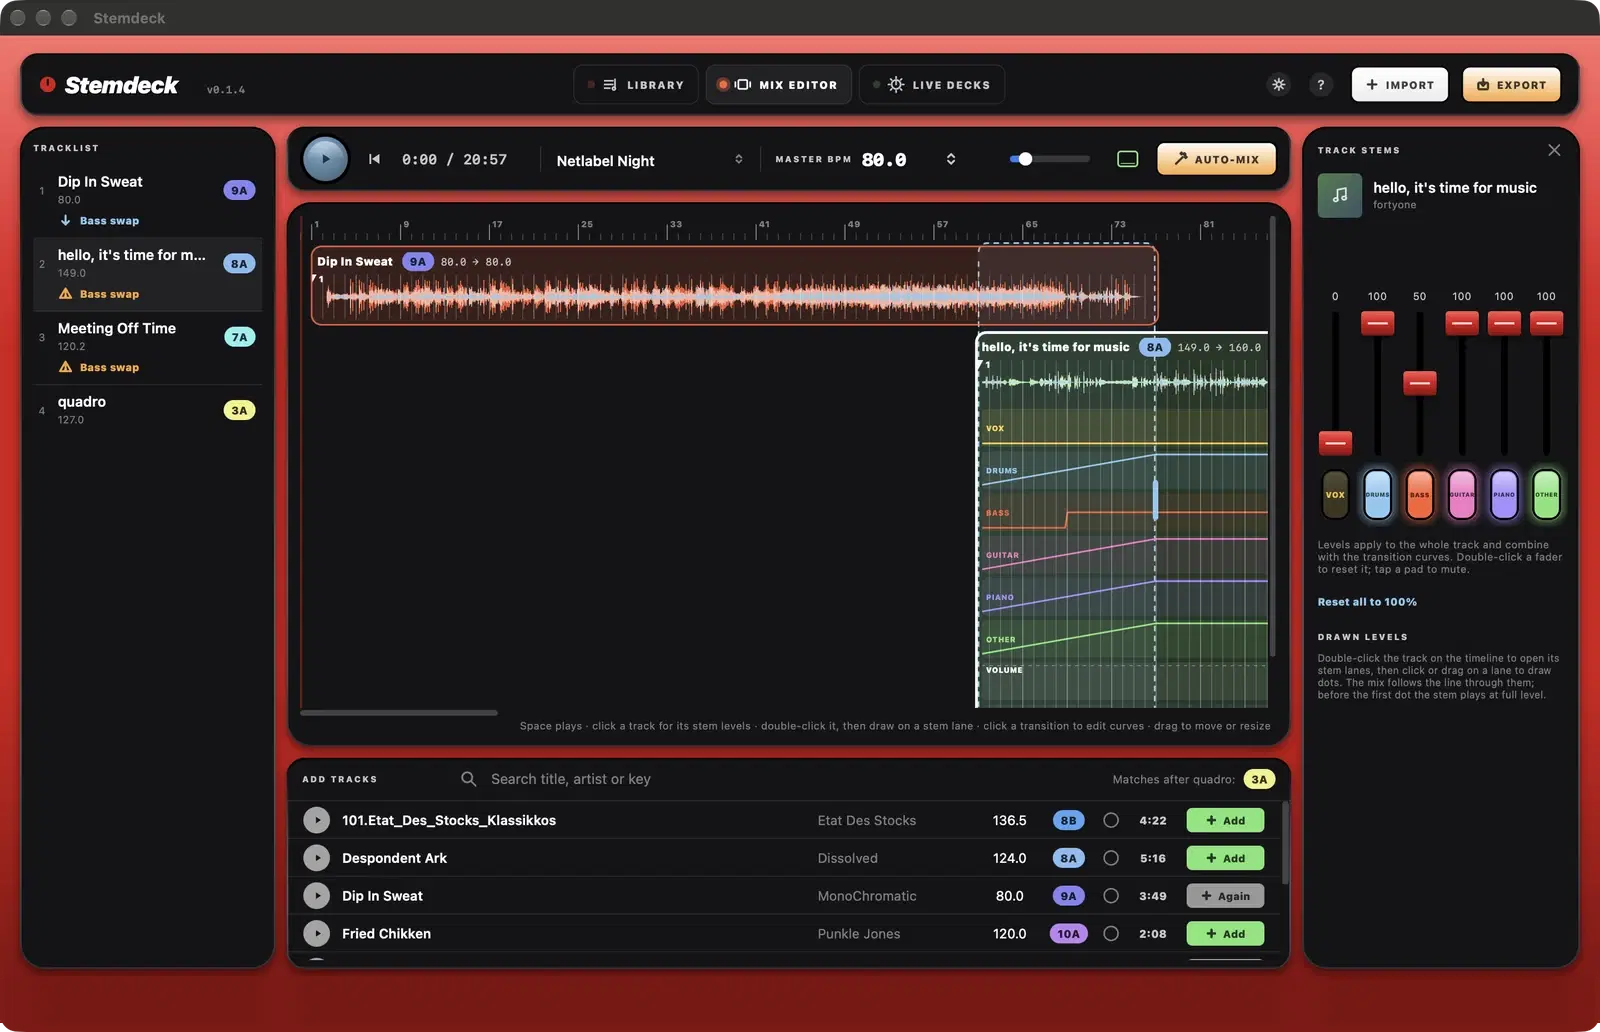
Click a track on the timeline to set the level of each of its stems for the whole track: four, or six with guitar and piano. Tap a pad to mute a stem and double-click a fader to reset it. Levels combine with the transition curves, so a muted vocal stays muted through its transitions.
Draw stem levels
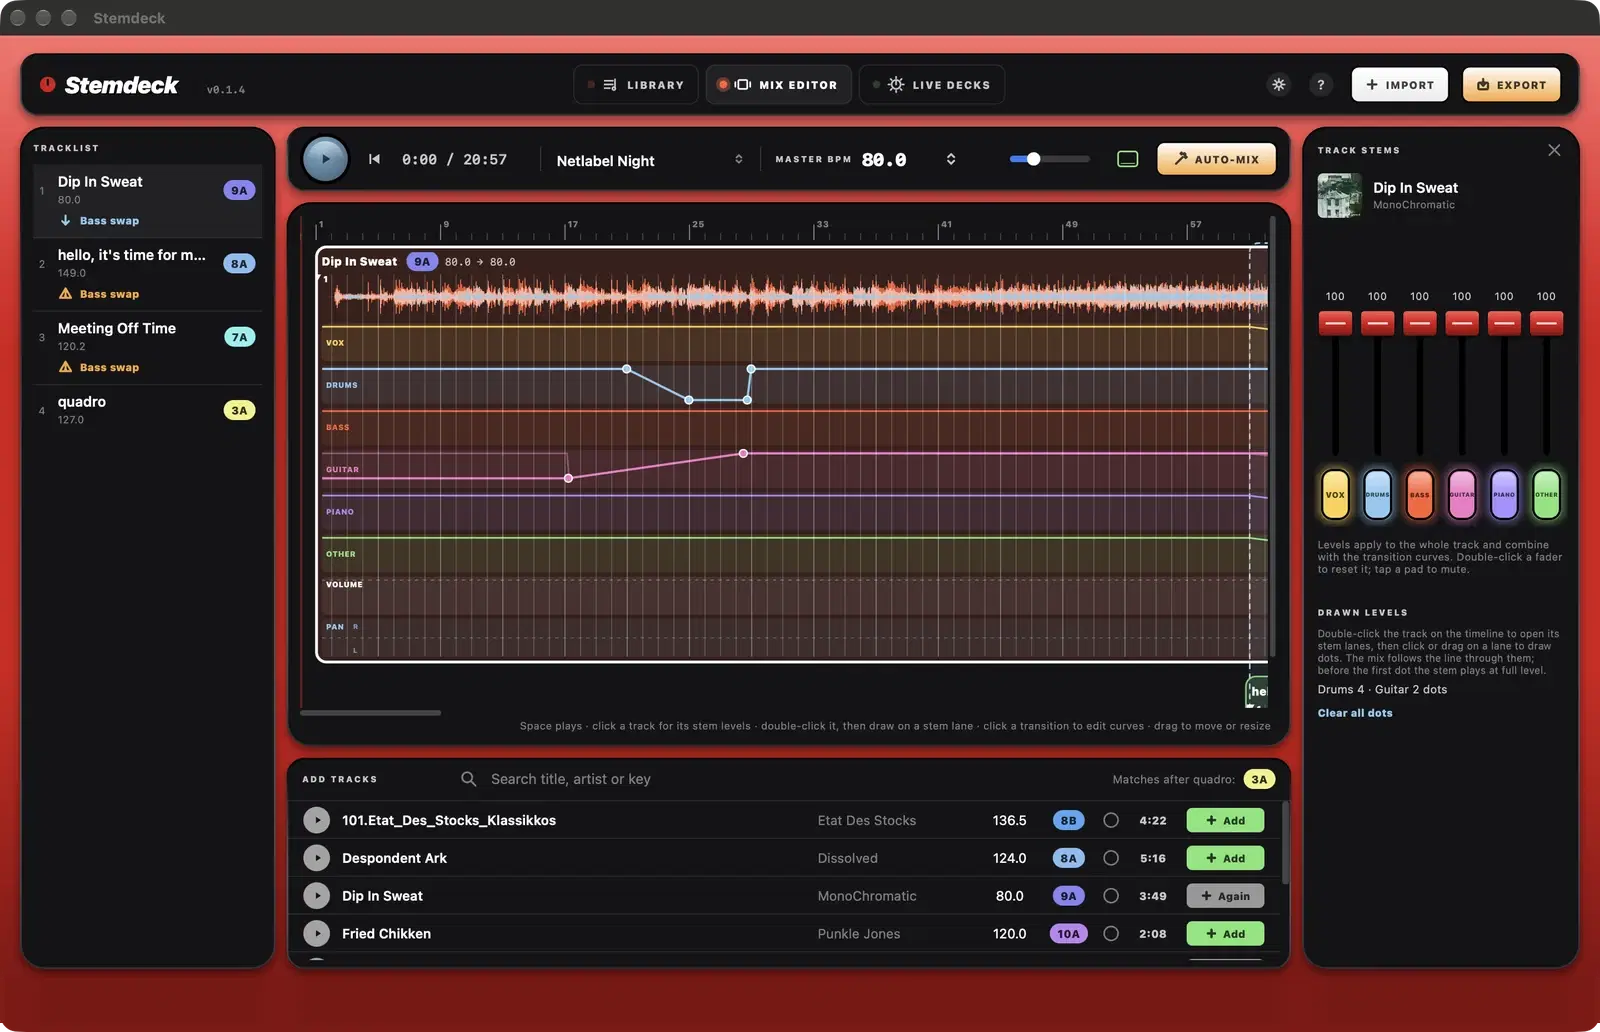
Draw how loud each stem is, dot by dot, like an automation clip. The mix follows the line through your dots, so you can drop the drums for a few bars or slowly bring in the other parts.
- Double-click a track on the timeline to open its stem lanes, one for each of its four or six stems.
- Click a lane to add a dot, or drag along it to draw several. Higher is louder.
- Dots snap to beats. Hold Command to place one between beats.
- Drag a dot to move it. Option-click a dot to delete it, or right-click a lane to clear it.
- Before the first dot a stem plays at full level, so one stray dot can't silence a whole track. After the last dot the level stays where that dot is. A stem with no dots plays at full level.
- Dots stay a finger's width apart on screen however far you zoom out, so lines stay easy to edit. Zoom in for finer detail.
- Dots move with the track when you drag it, and combine with the transition curves and track stem levels.
- Playback, export and auto-mix on the decks all follow the dots.
Automation lanes
In the version for Windows, Linux and the downloadable Mac version (from 0.1.4), each track also has automation lanes for Volume, Pan, Filter, Echo, Reverb and Crush, drawn with dots just like stem levels. Use them to fade a track in, pan it across, sweep a filter or throw an echo at the end of a phrase.
- Double-click a track to open it: Volume and Pan show under its stem lanes. Right-click the track and choose Automation lanes to show Filter, Echo, Reverb or Crush too.
- Click a lane to add a dot or drag along it to draw several. Drag a dot to move it, Option-click (Alt-click on Windows and Linux) to delete it, and right-click a lane to clear it or hide it.
- Each lane does nothing until its first dot: full volume, pan in the centre, filter off and the effects dry. A lane with dots always shows.
- Pan is marked L and R. Filter runs from a low-pass at the bottom, through off in the middle, to a high-pass at the top.
- Playback and export both follow the lanes, so what you hear is what you export.
Listen
- Press the play button or Space to play the mix. The red playhead follows it.
- Click the ruler to play from that bar.
- Edits made while playing are heard straight away.
Questions
Why does a track show its BPM in red?
Its tempo is far from the master BPM, so it would play noticeably faster or slower. Choose a master BPM closer to it, or turn on Follow each track's own tempo.
Does the mix change my tracks?
No. Mixes only store how the tracks are arranged. Your files and stems are never changed.
Try it in Stemdeck
Free downloads for Mac, Windows and Linux, with the stem models included. Coming soon to the Mac App Store for Macs with Apple silicon.